|
First time trying one of my Tutorials? Then please check my Terms of Use before you continue
You will need: Font of your choice - I used one called Stunning Close Up and Tube of your choice - I will be using the artwork of Psyco Jimi This artist is not currently selling their art in Tube Format
Ok let's begin Set your Foreground to a color from your Tube Set your Background color to White Click on your Foreground again and set it to Gradient ... with the following settings
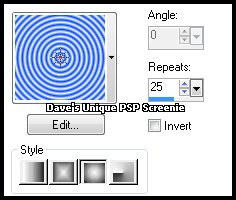
Open a New Image 600x600 Flood Fill with your Gradient Effects> Distortion Effects> Pixelate ... with the following settings
Effects> Edge Effects> Enhance
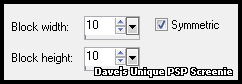
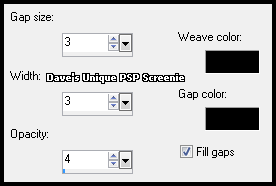
Layers> Duplicate ... Activate the Bottom layer Effects> Texture Effects> Weave ... with the following settings
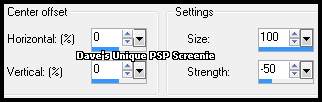
Activate the Top Layer Effects> Distortion Effects> Warp ... with the following settings
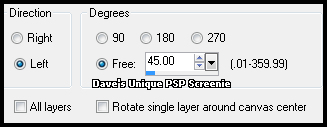
Image> Free Rotate ... with the following settings
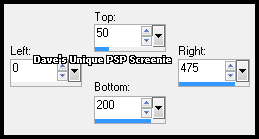
Make a Custom Selection ... with the following settings
Image> Crop to Selection Change this layers Blend Mode to Hard Light
Paste your Tube as a New Layer and position on the Right side of your Tag Make a Custom Selection ... with the following settings
Play around with the Right until the right side of your Selection is midway through your Tube like so
Layers> New Raster Layer ... Flood Fill this Selection with your color from your Tube Selections> Modify> Contract by 2 ... Flood Fill this Selection with White Lower this layers Opacity to 65% ... Selections> Select All Selections> Float ... Selections> Defloat
Activate the layer above the Background layer ... Hit DELETE on your keyboard Activate the Top layer ... Layers> Arrange> Move Down Paste your Close Up as a New Layer
Move over your Selection so the part you want to keep is inside it Selections> Invert ... Hit DELETE on your keyboard Selections> Select None ... change this layers Blend mode to Luminance or Luminance (L) Layers> Arrange> Move Down
Apply Suitable Drop Shadows to your Tube Activate the Top layer ... Layers> New Raster Layer ... Flood Fill with your Tube color Selections> Select All ... Selections> Modify> Contract by 2 ... Hit DELETE on your keyboard Selections> Select None
Add Copyrights and your Name ... Layers> Merge> Merge Visible And that's it all that's left is to Save your Tag
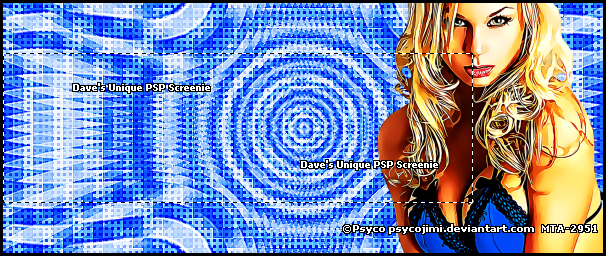
Here is a another example made by my friend Sezy
Tutorial written on the 29/02/2012 ©David Hanslip |