|
First time trying one of my Tutorials? Then please check my Terms of Use before you continue
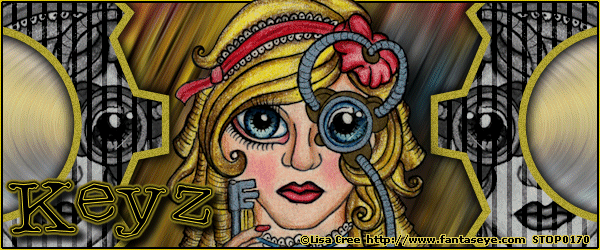
You will need: Font of your choice - I used one called LDJ Pretty Smart Tube & Close Up of your choice - I will be using the artwork of Lisa Cree This artist is not currently selling her art in Tube Format My Template SpawnsFSTemplate006
Filters: Eye Candy 6/Gradient Glow
Ok let's begin Open my Template ... Window> Duplicate ... Close Original Delete the Credits and Mini Cogs layers Activate the Middle Background layer Paste your Close Up as a New Layer ... make sure it covers the middle like so
Adjust> Blur> Motion Blur ... with the following settings
Edit> Repeat Motion Blur ... Effects> Edge Effects> Enhance ... Layers> Merge> Merge Down Activate the Right Outer Background layer ... Selections> Select All ... Selections> Float ... Selections> Defloat Paste your Tube as a New layer and position so it covers the Selection (any part of the Tube will do) Selections> Invert ... Hit DELETE on your keyboard
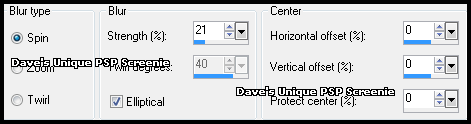
Selections> Select None ... Crop Image 600x250 Adjust> Blur> Radial Blur ... with the following settings
Effects> Edge Effects> Enhance Layers> Duplicate ... Image> Mirror ... Layers> Merge> Merge Down Activate the Right Outer Background layer again ... Layers> Merge> Merge Down Selections> Select All ... Selections> Float ... Selections> Defloat Selections> Invert ... Activate the Raster 1 layer ... Hit DELETE on your keyboard Lower this layers Opacity to around 60% ... Layers> Merge> Merge Down
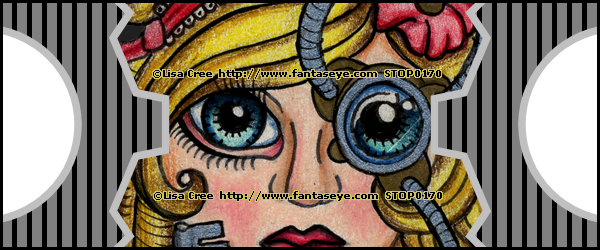
Activate the Right Inner Background layer ... Selections> Select All ... Selections> Float ... Selections> Defloat Paste your Tube as a New layer ... Move over your Selection so the part you want to keep is inside it Selections> Invert ... Hit DELETE on your keyboard ... Selections> Select None Change this layers Blend Mode to Luminance ... Rename this layer ANI
Layers> Duplicate ... Image> Mirror ... Layers> Merge> Merge Down Activate the Right Inner Background layer again ... Layers> Merge> Merge Down Effects> Eye Candy 6> Gradient Glow ... with the following settings Click on the "settings" tab and select the "Simple (Thin)" folder then select "Black"
In your layer palette move the Left Outer Background to between the Left Inner Background and Middle Background layers Activate the Right Stripes layer ... Layers> Merge> Merge Down ... Change this layers Blend Mode to Overlay Activate the Right Cog Lines layer ... Layers> Merge> Merge Down
Adjust> Hue and Saturation> Hue/Saturation/Lightness play around with the setting until you cog lines are a color you like and the click OK Adjust> Add/Remove Noise> Add Noise ... with the following settings Uniform - checked ... Noise - 15% ... Monochrome - checked Activate the Inner Border layer
Adjust> Hue and Saturation> Hue/Saturation/Lightness play around with the setting until your border is a color you like and the click OK Activate the Outer Border layer Adjust> Hue and Saturation> Hue/Saturation/Lightness play around with the setting until your border is a color you like and the click OK Layers> Merge> Merge Down
Paste your Tube as a New Layer, position in the middle of your Tag making sure the top and bottom of the Tube go over the border ... Apply a suitable Drop Shadow Activate the Inner Border Layer ... Make a Custom Selection with the following settings
Selections> Promote Selection to Layer ... Selections> Select None With the promoted layer active Layers> Arrange> Bring to Top Add Copyrights and your Name
ANIMATING
Edit> Copy Special> Copy Merged Edit> Select All ... Animation> Frame Properties ... change to 25
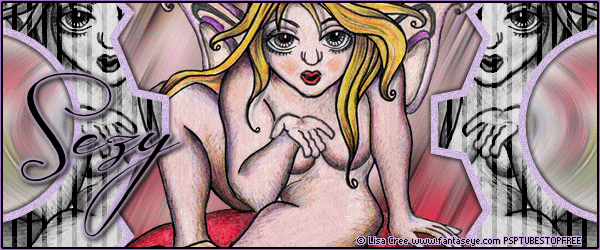
Here is another example by my friend Sezy
Tutorial written on the 02/06/2012 ©David Hanslip |