|
First time trying one of my Tutorials? Then please check my Terms of Use before you continue
You will need: Font of your choice - I used one called Scbyzhouse Tube & Close Up of your choice - I will be using the artwork of Danny Drake This Artist no longer sells their art in Tube Format
Filters: Mura's Meister/Copies Filter Factory N/Diamond Glass AAA Frames/Foto Frame
Ok let's begin Open a New Image 600x250 ... Paste your Tube as a New Layer Effects> Mura's Meister> Copies ... *Wall Paper(rotate) ... default settings Edit> Repeat Copies ... same settings as above
Selections> Select All ... Selections> Clip to Canvas Image> Crop to Selection Adjust> Blur> Motion Blur ... with the following settings
Effects> Edge Effects> Enhance Edges Effects> Filter Factory N> Diamond Glass ... with the following settings
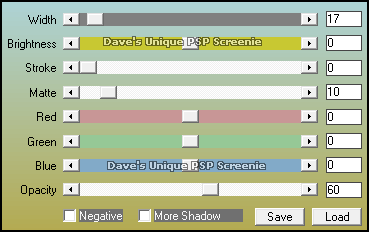
Effects> AAA Frames > Foto Frame ... with the following settings
Rename this layer Background Paste your Tube as a New Layer, position on the Right side of your Tag and apply a suitable Drop Shadow Layers> New Raster Layer Flood Fill with White .... Lower this layers Opacity to 60% ... Selections> Select All Selections> Modify> Contract by 7 Hit DELETE on your keyboard ... Selections> Select None Layers> New Raster ... Flood Fill with Black ... Selections> Select All ... Selections> Modify> Contract by 1 Hit DELETE on your keyboard ... Selections> Select None ... Layers> Merge> Merge Down Rename this layer Border
Activate the Background layer ... Selections> Select All ... Selections> Modify> Contract by 28 Paste your Close Up as a New Layer and position to the Left making sure what you want to keep is inside the Selection Selections> Invert ... Hit DELETE on your keyboard ... Selections> Select None
Effects> Tramages> Tow The Line ... with the following settings
Effects> 3D Effects> Drop Shadow ... 0, 0, 100, 0, color from your Tube Shadow on new layer - checked
Activate the Close Up layer ... Change this layers Blend Mode to Luminance(L) Layers> Merge Down ... Lower this layers Opacity to around 40% ... rename this layer CL Activate the Top layer ... Apply Copyrights an your Name Activate the CL layer ... Edit> Copy
ANIMATING Open Animation Shop ... Edit> Paste> As New Animation Effects> Insert Image Effects
Click once on the Last Frame (21) ... Edit> Paste> After Current Frame Animation> Reverse Frames
Return to PSP and activate the Background layer ... Edit> Copy Hold down CTRL and keep pressing L until you have the same amount of frames as your animation (should be 42)
Activate your animation ... Edit> Select All ... Edit> Copy Activate your Tag ... Edit> Select All ...Edit> Paste> Into Selected Frames Move into position and click once (I zoomed in to help with positioning) You can delete the animation only image now as you don't need it
Edit> Paste> As New Animation Hold down CTRL and keep pressing L until you have the same amount of frames as your animation (should be 42) Edit> Select All ... Edit> Copy Activate your Tag ... Edit> Select All ...Edit> Paste> Into Selected Frames Move into position and click once (I zoomed in to help with positioning)
Highlight the 1st frame by clicking on it once ... Animation> Frame Properties ... change to 130 And that's it. All that's left is to save your Tag ... If you wish to Preview it first View> Animation
Here is another example also using the artwork of Danny Drake
Tutorial written on the 18/05/2013 ©David Hanslip |