First time trying one of my Tutorials? Then please check my Terms of Use before you continue
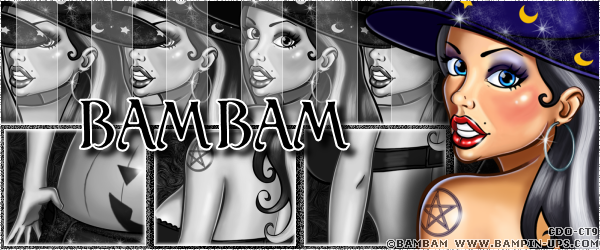
You will need: Font of your choice Tube and Close Up of your choice - I will be using the artwork of BamBam This artist is not currently selling their art in Tube Format My Template SpawnsFSTemplate132
Filters: Eye Candy 6/Gradient Glow (optional) Eye Candy 6: Textures/Swirl Mura's Meister/Copies
Ok let's begin Open my Template ... Window> Duplicate ... Close Original ... Delete the Credits layer Firstly we need to rearrange a few layers Move Square Frame 2 to below Square Frame 1 Move Square Frame 3 to below Square Frame 2 Move Square Frame 4 to below Square Frame 3
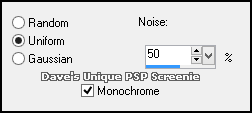
Merge all of the Square Frame layers together Adjust> Add/Remove Noise> Add Noise ... with the following settings
Now you can do a Drop Shadow here or a Gradient Glow it's your choice Effects> 3D Effects Drop Shadow ... 0, 0, 100, 3, White ... repeat 4-5 Times (or more if needed)
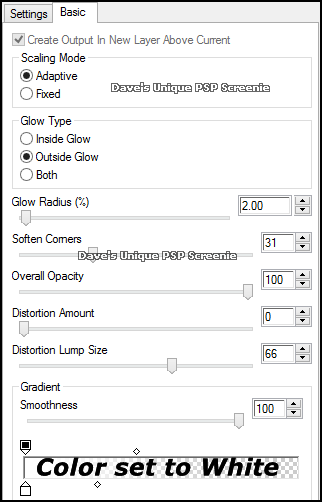
Effects> Eye Candy 6> Gradient Glow ... with the following settings
Activate the Square 1 layer Selections> Select All ... Selections> Float ... Selections> Defloat Paste your Tube as a New Layer, move around until what you want to keep is inside the Selection Selections> Invert ... Hit DELETE on your keyboard ... Selections> Select None Adjust> Hue and Saturation> Colorize ... both set to 0 Repeat the steps in green above on the Square 2, Square 3 and Square 4 layers
Activate the Square 1 layer Effects> Eye Candy 6: Textures> Swirl ... with the following settings Click on the "Settings" tab and then on the "Settings Tour (seamless tile)" folder then click on "Painterly: Random Twists" so it is highlighted blue Click on the "Basic" tab and change the "Color Source" to Add Swirl to a Solid Color and change the color to Black Be sure to click the "Random Seed" button once as well
Activate the Square 3 layer Effects> Eye Candy 6: Textures> Swirl ... with the same settings as above be sure to click the "Random Seed" button once
Activate the Square 2 layer Effects> Eye Candy 6: Textures> Swirl ... with the following settings Click on the "Settings" tab and then on the "Settings Tour (seamless tile)" folder then click on "Textures: Curves, Curly Brown" so it is highlighted blue Click on the "Basic" tab and the "Color Source" change the color to Black Be sure to click the "Random Seed" button once as well
Activate the Square 4 layer Effects> Eye Candy 6: Textures> Swirl ... with the same settings as above be sure to click the "Random Seed" button once
Activate the Darker Lines layer Effects> Edge Effects> Enhance More ... change this layers Blend Mode to Screen and the Opacity to 50% Activate the Lighter Lines layer ... Paste your Tube as a New Layer Adjust> Hue and Saturation> Colorize ... both set to 0
Effects> Mura's Meister> Copies ... *Line ... change the Number to one suitable (I changed it to 5) You may need to use the Mover Tool to move this layer up or down until it's in a position you are happy with Activate the layer with the Frames on it Paste your Close Up as a new Layer and position on either side of your Tag Apply a suitable Drop Shadow
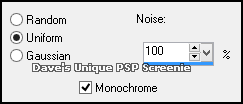
Activate the 1 Pixel Border layer Adjust> Add/Remove Noise> Add Noise ... with the following settings
Selections> Select All ... Selections> Clip to Canvas ... Image> Crop to Selection Add Copyrights and your Name and that's it all that's left is to save your Tag
Tutorial written on the 08/09/2013 ©David Hanslip |